
 11 August 2026
 Share
Share
1

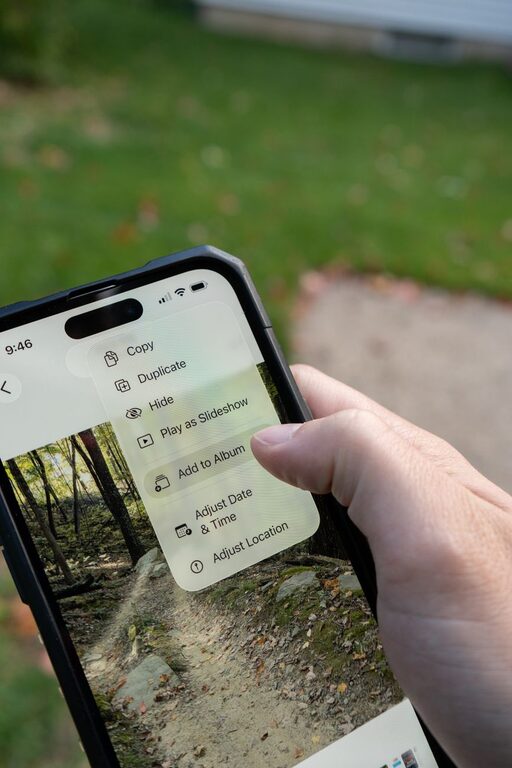
Your phone may hold thousands of photos, from everyday snapshots and screenshots to travel memories and important documents. Without a simple system, finding one picture can become frustrating, and your storage may fill up faster than expected.
The good news is that organizing photos does not require a complicated app or a large time commitment. With a few practical habits, you can create a photo library that is easier to search, safer to store, and simpler to maintain.
Before creating albums or changing settings, remove photos you no longer need. A quick cleanup can make the rest of the organizing process much easier.
Set aside 15 to 30 minutes and review your library in sections. You might begin with recent photos, screenshots, or videos. Avoid trying to organize everything at once. Smaller sessions are easier to manage and less tiring.
Look for:
– Blurry or accidental photos
– Multiple versions of the same image
– Screenshots that are no longer useful
– Old memes, receipts, or temporary reference images
– Videos you do not want to keep
– Photos with poor lighting or distracting details
Many phones group similar images or offer a feature that suggests duplicate photos. Review these suggestions carefully before deleting anything. Similar images may look alike but still contain small differences that matter to you.
Deleted photos are often moved to a Recently Deleted or Trash folder instead of being removed immediately. This gives you time to recover something by mistake, but these files may still use storage until the folder is emptied.
After confirming that you no longer need the deleted items, clear this folder. If you are unsure, leave it alone for a few weeks and review it again later.
Albums can help you find groups of photos without changing the main photo timeline. The best albums are simple and useful rather than overly detailed.
Consider creating albums for:
– Trips and vacations
– Family and friends
– Pets
– Hobbies and projects
– Celebrations and events
– Important documents
– Favorite photos
– Photos you want to print or share
Avoid creating a separate album for every small occasion. Too many albums can make your library harder to navigate. Instead, choose broad categories that you will remember easily.
For example, one album called “Travel” may be more helpful than separate albums for every day of a short trip. If your phone supports subfolders or more advanced album tools, you can add detail later.
Use names that explain the contents at a glance. Include a place, event, or year when it helps.
Examples include:
– Chicago Weekend 2025
– Family Celebrations
– Home Projects
– Documents To Review
– Favorite Landscapes
Consistent naming makes albums easier to scan and search. You do not need a complex naming system; just use the same basic approach each time.
Modern photo apps can often search by date, location, people, objects, or text in an image. Use these tools before manually scrolling through your entire library.
Try searching for terms such as:
– A city or destination
– A month or year
– “Screenshots”
– “Receipts”
– “Dogs” or “beach”
– A person’s name, if your phone supports face grouping
– A word visible in a photographed document
Search features may not be perfect, so check the results before making decisions. They are especially useful when you remember what a photo contains but not when you took it.
If your phone allows you to add captions, descriptions, or keywords, use them for photos that are difficult to identify later. A short note such as “Kitchen paint colors” or “Warranty information” can save time.
Screenshots and downloaded images can quickly overwhelm a photo library. Create a routine for handling them.
At the end of each week, review temporary images and decide whether to:
This is particularly helpful for screenshots of directions, product information, event details, and online conversations. If the information matters long term, storing it in a dedicated app may make it easier to find than keeping it among personal photos.
A backup protects your memories if your phone is lost, damaged, or replaced. Use a trusted cloud photo service, a computer, an external drive, or a combination of methods.
Before relying on a backup, confirm the following:
– The backup feature is turned on
– Photos are uploading successfully
– Videos are included if you want to keep them
– You have enough storage space
– You know how to access the backed-up files
– Your account password and recovery options are current
Do not assume that seeing a photo on your phone means it has been backed up. Open the service on another device or check its backup status to confirm.
Many photo services offer options that reduce the space used on your phone after files are safely uploaded. These settings can be helpful, but read the descriptions carefully. Some options may store a smaller version on your phone while keeping the full-quality original online.
If you need high-resolution files for printing or editing, make sure you know where the original version is stored and how to download it.
Use a Favorites feature for images you access frequently. Favorites can include family photos, travel pictures, reference images, or pictures you plan to share.
You can also create a “Best Of” album once or twice a year. This gives you a smaller collection of your most meaningful photos and makes it easier to revisit them.
For important documents photographed with your phone, consider keeping copies in a secure document or storage app as well. A photo library is convenient, but it may not offer the organization, search, or sharing controls that documents require.
Photo organization works best as a regular habit rather than a large annual project. Choose a schedule that fits how often you take pictures.
A simple routine might look like this:
Delete obvious mistakes and unnecessary screenshots when you notice them.
Review recent photos, remove duplicates, and place useful images in albums.
Check backup status, review large videos, and clear temporary images.
Look through older albums, update your Favorites collection, and review storage use.
You can also organize photos immediately after an event. Spend a few minutes deleting weak images and creating an album while you still remember the details.
Review which apps can access your photos. Many phones let you choose whether an app can see your entire library, selected photos, or no photos at all.
Only grant the access an app needs. Check these permissions occasionally, especially after installing new apps or changing devices.
Be thoughtful when sharing photos as well. Some images may include location details, personal documents, home addresses, or other information in the background. Use your phone’s sharing options to review privacy settings when necessary.
The most effective system is one you can maintain. Keep your approach simple, use albums for broad categories, remove temporary images regularly, and verify that your photos are backed up.
You do not need a perfect library. The goal is to make important photos easier to find and protect while reducing clutter. Start with the most recent images, create a few useful albums, and build a routine that takes only a few minutes at a time. Over time, these small steps can turn a crowded camera roll into a well-organized personal archive.
